Worm Composting 101: How to Start a Worm Bin
Starting your own worm composting bin is really easy, good for your garden, inexpensive and best yet, anyone can do it. Vermicomposting allows you to take those scraps that you would normally throw away and turn into black gold, oftentimes faster than traditional composting. Below is a quickstart guide with 5 easy steps.
1. Select Worm Bin
There are many different things you can use as a worm bin but for the sake of simplicity, I will go over my two favorite options. One cheap and one a bit more expensive, both are small and require a very similar setup.
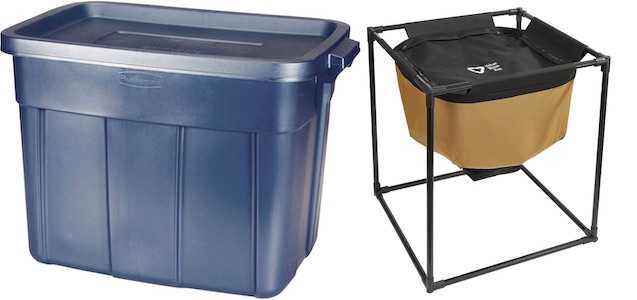
Rubbermaid Bin (10 Gallon)
Pros: It’s cheap, need I say more?
Cons: Requires some DIY know-how and getting the castings are labor intensive.
Urban Worm Bag
Pros: At around $100 it’s not cheap but definitely not the most expensive option out there. It is an out of the box solution and more importantly, it’s very easy to get casting.
Cons: Can dry out and the stand is wobbly, it hasn’t fallen over but it really does feel like it might.
2. Making The Bedding
When keeping worms for composting it’s generally better to keep worms in a moist bedding material instead of soil. By using a mix of materials that are high in carbon and moisture absorbent we can create the ideal environment for our worms.
The bedding is not just a place for the worms to live but it also is a source of food. 50% of a worms diet will be eating its bedding. Creating a well balanced of green and brown materials is probably the most important part of composting. Most common problems when worm composting can be solved by add fresh bedding.
What makes great worm bedding?
The material should have the following traits:
- Holds Moisture
- Does not Compact
- pH Neutral
- Odorless
- Not sharp
- block out light
What material do people use?
The best approach is to add a variety of everything of the following in the worm bin. That way you can balance the strengths and weaknesses of each material with each other.
- Brown Cardboard
- Paper (Not Bleached)
- Newspaper (Not Colored)
- Aged compost
- Aged Horse Manure
- Coco Coir
- Peat moss
- Straw
- Yard waste
- Wood Chips
What I Use
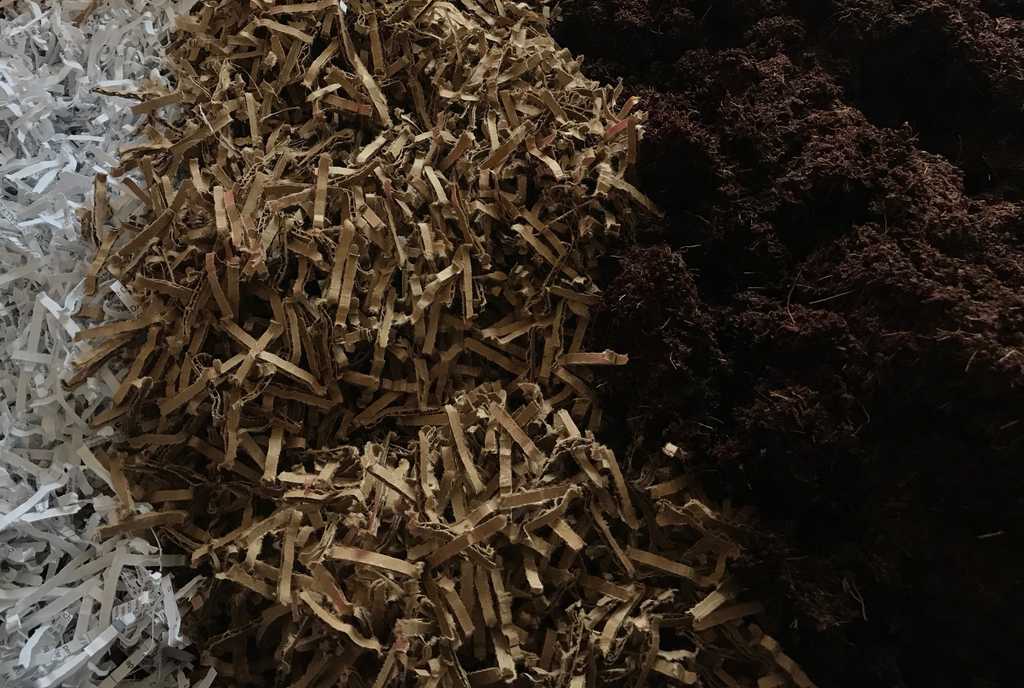
Even though its best to add all of the previous materials listed, I am all about using what I have on hand. It feels wrong to go out and buy something to then compost. Generally, I always have Coco Coir, Cardboard, Paper laying around the house. Make sure the cardboard and paper do not have color ink. Colored ink can contain chemicals that the worms find toxic.
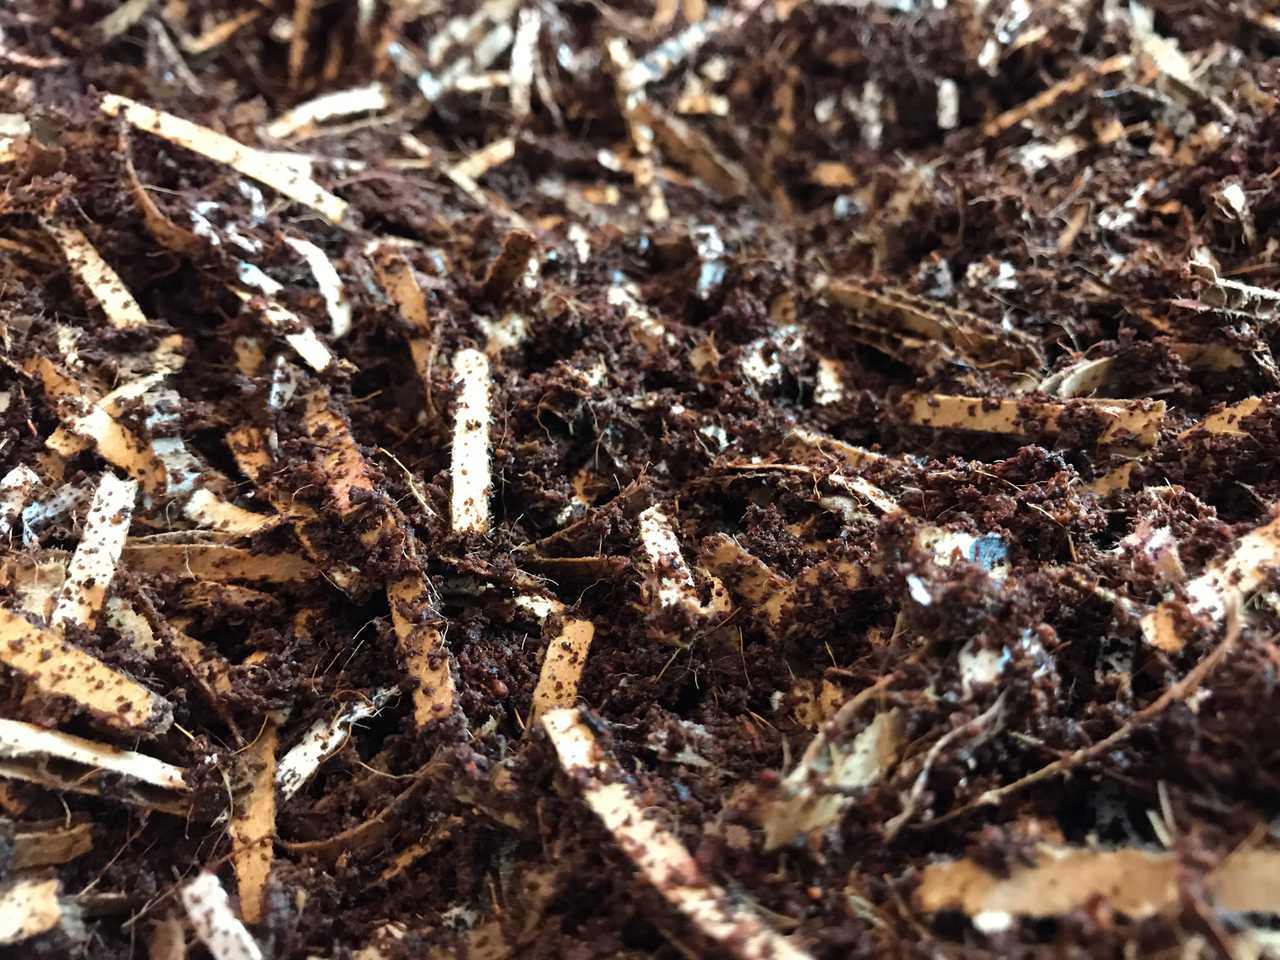 First I take the cardboard and paper and run it through a shredder. Take equal parts of all 3 materials and mix them together into a container. After I feel that it’s relative the same amounts, it doesn’t need to be perfect, I will pour enough water into the bin to fill everything by an inch. Let the material sit in the water for 3 to 4 hours. Then start taking a handful at a time wringing it out and place it into a new bin. Your bedding should have a “Damp Sponge” feel to it.
If you are starting a new bin from scratch then it’s important to add at least 25% worm compost or horse manure. Most people say that horse manure is best but I never have that on hand so often times I will just use worm compost.
I also will add about 5% of Alfalfa Meal to my mix since I generally have that on hand. I find that it helps with the next step of getting the microbes blooming.
3. Wait
We’ve created a beautiful home for the worms but it’s not ready for them to move in yet. We need those beautiful microbes to join the party. So put a banana peel or apple core or something that will breakdown fast into your bin and wait a few days.
4. Put the Worms into the Bin
Just drop them into the bin and keep your lid off and a light on for the first night. This will help them to make their way below the surface instead of escaping into the area around.
5. Feeding
Now that the worms are in their new home you probably think you can start feeding them immediately but don’t. They should have plenty to eat between the cardboard and the paper. Give them a week to settle in and then start feeding them slowly.
Feeding is more of an art than an exact measurement per week. Worms don’t like to be disturbed so I would recommend only feeding them once or twice a week. If you see a lot of scraps left over from the previous feeding then wait. It’s really important NOT to overfeed them, this is by far one of the worst things you can do.
Bury the food a couple of inches under the bedding, in a different spot each time. Be sure to cover food with bedding or you might get a fruit fly problem. Start adding more bedding when it is difficult to bury food scraps.
6. Enjoy
In a couple of months, you should start to notice rich finished compost. Harvest and enjoy your relatively cheap fertilizer, I know your tomatoes will.